Crochet Stitches for bags Guide Part 4 and one more cute decorative stitch will be added to our list of decorative stitches. The humble but never the less adorable Bumpy rows stitch. And I say humble because it has nothing to do with the super voluminous stitches we covered in the previous 2 chapters of this crochet stitch guide.
If you missed the earliest posts of this stitch inventory, click on the following links and find all about the Zig Zag Puff stitch, the Balloon stitch, and the Slanting bead Stitch. But if you find these chunky fellows too much for you, then stick to this article because I am about to show you a stitch you’re about to love.
A stitch that is suitable even for beginners, as it requires basic stitch knowledge. This is why the Bumpy rows stitch is simply a combination of the single crochet and the double crochet, that produces a really thick non-transparent solid fabric with a really beautiful raised texture.
Bumpy rows stitch looks very similar to the bobble stitch but it is much easier to work. First of all, because you don’t’ have to struggle to pull through a heap of loops on your hook. The second reason is that there are no intermediate short rows of sc, and this helps your work progress much faster.
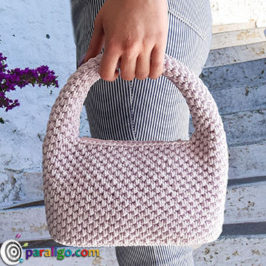
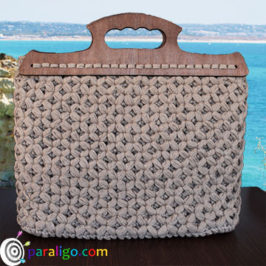
This stitch is only worked in rows, It’s reversible, and it is a one-row repeat. It is not increasable or decreasable and therefore it’s suitable for bags pieced together from straight-edged parts. Actually, it’s ideal for this purpose and consequently perfect for pochette and clutches because it produces really straight edges.
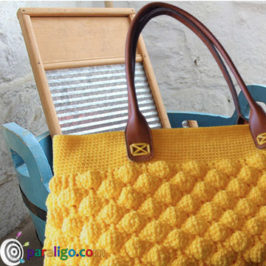
Bumpy rows crochet stitch
Abbreviations:
 ch – chain
sc – single crochet
dc – double crochet
Foundation:
Chain a multiple of 4 plus 1
Row 1:
Place a sc into the second chain from your hook. Place 1 sc into each stitch until the end of the row. Chain 2 and turn your work.
Row 2:
Place 3 dc into the very first stitch. *Skip the next 3 stitches and place one sc and 3 dc into the fourth stitch*. Repeat * * until left with 4 stitches. Skip 3 stitches and place a sc into the last. Chain 2 and turn your work.
Row 3:
Place 3 dc into the very first stitch. *Skip the next 3 stitches and place one sc and 3 dc into the fourth stitch*. Repeat * * until left with 4 stitches. Skip 3 stitches and place a sc into the last.
Row 4 and on:
Repeat row 3 until your reach desired height.
You can watch how to work the bumpy rows crochet stitch in the following video.
Tips
- If you want to avoid reinforcement use this stitch with a hard thick yarn like a medium cotton yarn.
- To make your bumps pop out make sure to work the single crochet that starts every bump slightly tighter than the double crochet.
Dos
- This stitch produces amazingly straight edges so its fabulous to be used with rectangle clasp frames or to create envelope clutches.
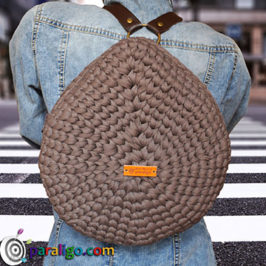
- This is a versatile stitch that could easily stand in an evening elegant bag but it could also be used to create a girly daily use bag like a small back pack.
Don’t
- This is a rich stitch that produces a dense and quite heavy garment. I wouldn’t use it for very large projects like shoppers or tote bags.
- Though not as voluminous as other decorative stitches Bumby rows also consume a lot of yarn. So again if you are on a budget, or if you are not sure you will be able to find the same lot of a few skeins leftover from some other project, this is not the stitch to use.