Paraligo is making a comeback with a Parisian flair. Houndstooth crochet bag is the topic of this new post, or if you prefer the French version of this stitch “Pied de poule crochet bag”. In this video, you will find out how you can make an elegant all-day crochet purse that you are going to love. Not only because it’s stylish and classic but mostly because it’s super – super easy.
This posh crochet bag can be made literarily in one afternoon thanks to its very simple pattern, and the fact that I used premade accessories to create it. For those of you who get intimidated by the thought of using bag parts and accessories, I strongly suggest that you have a look at one of my previous posts, dedicated to the purpose to scatter all your fears. To visit this post just click here.
Let’s see what you are going to need for this bag and how are you going to get it.
Supplies:
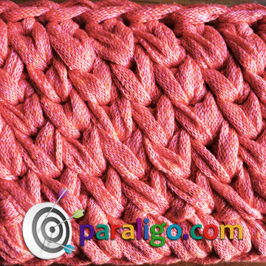
- 1 reel of 4mm white polyamide or polyester cord
- 1 reel of 4mm black polyamide or polyester cord
- 1 3mm crochet hook
- 1 5mm crochet hook
- 1 perforated black vegan leather oval bag shaper 24.5cm x 8.5cm (L x W)
- 1 perforated black vegan leather bag flap 24.5cm x 22cm (L x W)
- 1 black vegan leather extendable shoulder strap 130cm full length
- 2 round spring hooks 3cm Ø
- 1 piece of fabric for lining 30 x 60cm approx.
- 1 curved needle
- 1 spool of thread for sewing the lining
- 1 tape measure
- 1 wool needle
- Some pins
- 4 stitch markers
- Round nose pliers
- 1 lighter
- 1 pair of scissors
The materials I used in the video were supplied by an e-shop in Greece and I you’re interested in the specific products you can click here to purchase them.
The materials I am listing below are similar alternatives from the international market. Just click on the pictures to get them.


Now, let’s return to our bag. I will start by explaining the number of stitches required for this bag, as I promised in the Video. The houndstooth stitch is worked in an even number of stitches. My version of this bag is built on a perforated bag shaper (bag bottom) with 32 holes. Inside these holes is built an equal number of slip stitches as a ground round that precedes the pattern.
Afterward in each of these slip stitches are worked 2 double crochet. This doubles the number of stitches. In each of the 4 corner stitches of the shaper, we work 3 double crochet instead of 2. This adds 4 extra more stitches to our total of stitches of the 1st round.
If your bag shaper is of a different size or has a different number o holes just adjust the number of triple increases to end up in an even number of stitches (double crochet) in your first round.
If for example, your base has 45 holes, you will have 90 stitches by working 2 double crochet into each slipstitch that fills every hole. If you work 3 double crochet into each one of the four corner stitches you will have 4 extra double crochet to your total number of stitches. To wit, you will end up with 94 double to your first round a number that serves the pattern perfect as it is even.
Instructions:
Body of the bag: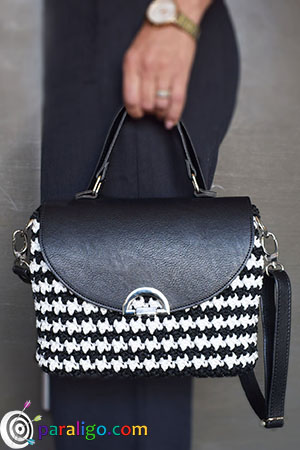
Ground round: Make a slip knot using your black yarn. Release and insert your hook two holes away from the upper left corner hole off your bag shaper. Insert your hook into the slip knot and pull it out. Place 32 slip stitches into the hose of your bag shaper. Place the last slip stitch into the hole that you placed your first one.
First round: Yarn over pull a loop and chain two. Yarn over, insert into the first slip stitch, and place a double crochet. Place one more double crochet into the same slip stitch. Place two double crochet in each slip stitch but place three double crochet in each of the four corner slip stitches. Slip stitch to join the last and first double crochet.
Second round: Chain one. Place one double crochet into the first stitch. Then place a single crochet into the next stitch. Repeat the previous two stitches until the end of the round. Slip stitch to join the first and the last stitch of the second round by yarning over the white yarn. Drop the black yarn to your right without carrying it.
Third round (White round): Chain one. Place a single crochet into the same stitch you slip stitched. Place a double crochet into the next stitch. Place a single crochet into the following stitch. Continue alternating between a single crochet and a double until the end of the round. Slip stitch to join the first and the last stitch of the second round by yarning over the black yarn. Drop the white yarn to your right without carrying it.
Fourth round (Black round): Chain one. Place a double crochet into the same stitch you slip stitch. Place a single crochet into the next stitch. Repeat these two stitches until the end of the round. Slip stitch to join the first and the last stitch of the second round by yarning over the white yarn. Drop the black yarn to your right without carrying it.
5th to 18th round: Repeat rounds three and four until you complete the 18th round.
When you complete the last stitch of the 18th round cut your yarn and fasten off. Insert your hook into the first stitch of the 18th round from the inside of your work. Yarn over your tail and pull it in.
Then insert into the last stitch of the 18th round from the outside of your work, back loop only, and pull the tail in. Thread your tail to your wool needle and weave it in at the inside of your bag. Finally cut the excess and burn the edge with a lighter.
Assembly:
- Sew the flap to the back of the bag at the height of the 16nth round with a piece of black yarn and the backstitch technique.
- Attach the lock with the help of the round nose pliers.
- Sew and pass the lining.
- Insert the spring hooks through the posts of the 1st and 3rd double crochet at the sides of the bag and slightly fold inwards.
- Slide the clips of the shoulder strap through the spring hooks.
Tips:
- Make your join slip stitches as tight as possible. The tighter the slipstitches at the joint, the more discreet the seam.
- I chose to use the simplest way to join rounds. You can experiment with less visible ways of changing rounds and yarn color, that require more skill. If you want me to show you similar ways in a future video, let me know with a comment.
- For this particular bag, I did not have to use mesh as reinforcement but it is rumored that I crochet relatively tightly. If you crochet very loosely, it might be a good idea to attach a piece of plastic mesh before the lining.
- If your base and flap are of different dimensions, your bag will still look just as good. Just make sure the length of the base is the same as the length of the flap. If their dimensions are much larger consider that you may need a second spool of yarn of each color.
Enough said and I believe it’s time to let you watch this relatively short video that will set you on fire and make you feel an unbeatable desire you to create your own wonderful Houndstooth crochet bag.