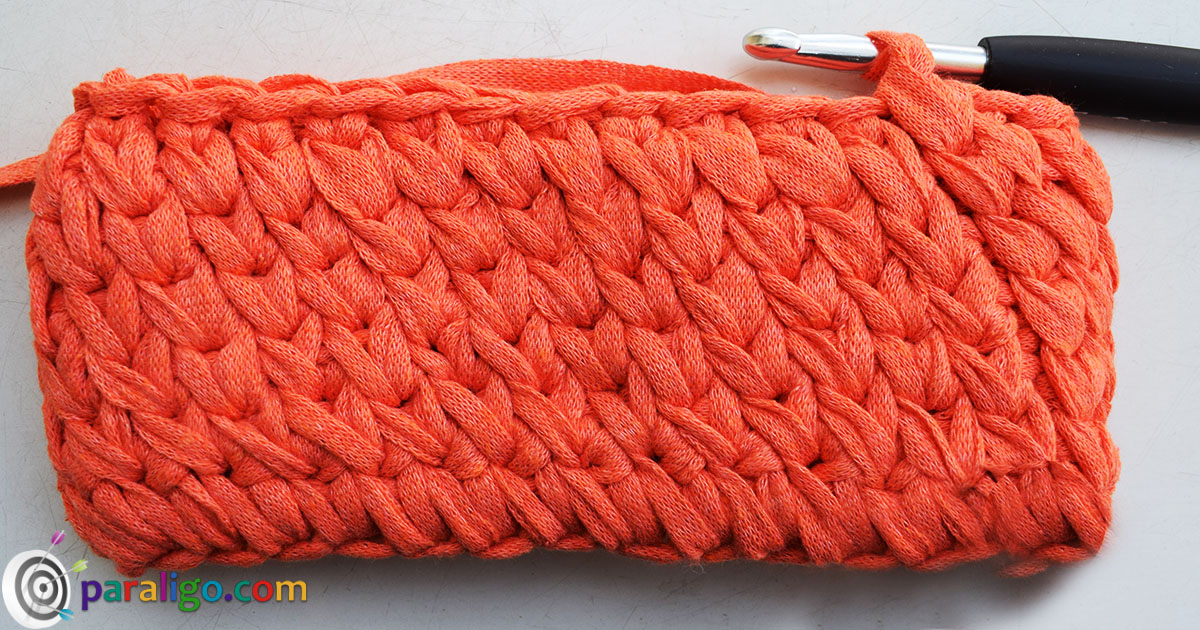
 This is the 7nth and last part of my Decorative crochet stitches for bags guide and again I am about to show a stitch that works amazing for summer bags. The Wrapped Rope stitch. And that’s because similarly to the Diagonal Herringbone stitch it has a what I call woven-like structure. In other words, if used with the appropriate yarn it can produce a fabric that looks very similar to woven straw handicrafts.
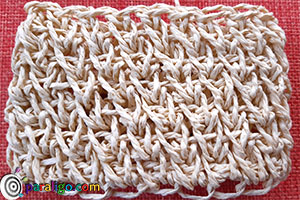
The Wrapped Rope stitch is only worked in the round and, it’s a one-round repeat pattern with the exception of the first round, which’s a round of single crochet. It is not increasable or decreasable and it requires basic crochet skills. It creates a solid thick fabric with a texture that looks a lot like crochet worked around rope hence the name of the stitch.
This stitch is quite easy to work and the rounds can be joined with a flawless invisible join. One thing that I like about it is that it works lovely with a great variety of yarn. From flat chunky yarn like ribbon or T-shirt yarn to thin jute or raffia twine the Wrapped Rope stitch is a beauty.
The Wrapped Rope stitch in joined rounds
Abbreviations
Ch: Chain
St: Stitch
SC: Single Crochet
Foundation:
Chain an odd number of chain stitches
Round 1:
Slip stitch into the first chain to join into a ring. Insert into the second chain from your hook and place a single crochet. Place a sc in each chain until the end of the round. When you finish the last sc release your hook and insert it into the first st of the round from the inside of your work. Then insert your hook into your open loop and pull it in.
Round 2:
Release your hook and insert under the first sc of the round and through your open loop at the inside of your work. Yarn over and pull a long loop that reaches the surface of the round. Insert your hook into the back loop of the next stitch yarn over and pull a loop. Pull the short loop through the long one and chain one.
*Insert your hook under the next sc of the 1st round yarn over and pull a long loop. Insert your hook into the back loop of the next stitch yarn over and pull a loop. Pull the short loop through the long one then yarn over and pull through 2 loops on your hook*. Repeat ** until the end of the round. When you finish the last sc release your hook and insert it into the first st of the round from the inside of your work. Then insert your hook into your open loop and pull it in.
Round 3 and on:
Repeat round 1 until your work reaches the desired height.
Tips:
- Make sure to work your foundation chain slightly loose to avoid the pot effect (narrow base large top).
- Pull your long loops slightly higher than the surface of the upper round to avoid squeezing the underlying stitches.
- After slip-stitching your long loop into the back loop of the next stitch, make sure to pull up your loop slightly higher normal This way you will have a nice and big enough sc without resulting in huge loops at the top of your stitch.
Dos:
- If you want to avoid reinforcement work the Wrapped Rope stitch with a thick yarn like Ribbon yarn or T-shirt yarn. The results will be a very solid fabric that holds its shape.
- You must certainly try this stitch with a plant-based yarn like jute or raffia. Though when used with thinner yarn the stitch loses in solidity the optical effect is really a sight for sore eyes.
Don’ts:
- Don’t use this stitch if your intention is to create a refined evening piece. I always say that it is a matter of taste but truly I believe this is a case where the stitch itself shouts day bag!
- The Wrapped Rope stitch is not a yarn eater but still, it consumes quite a lot of yarn. If your yarn supplies are stretched I suggest that you use a different stitch.