The next Dense stitch for crochet bags that I am going to present to you was given this long and probably slightly incorrect name by me. If you have encountered this stitch before and you know its original name feel free to educate me. The slanting waistcoat stitch, as implied by the title, is a variation of the waistcoat stitch. It produces a thick crochet fabric, but with a more textured appearance and a beautiful oblique motion.
To work the slanting waistcoat stitch in a spiral you need an od number of chain stitches. The stitch is formed by the combination of two stitches. A single crochet and a waistcoat. This stitch is only worked in the round ideally in the spiral. In one of my older videos, I managed to work the slanting waistcoat stitch in joined rounds with increases and with an invisible join. Though I would not consider my technique absolutely flowless you can watch the video at bottom of this page.
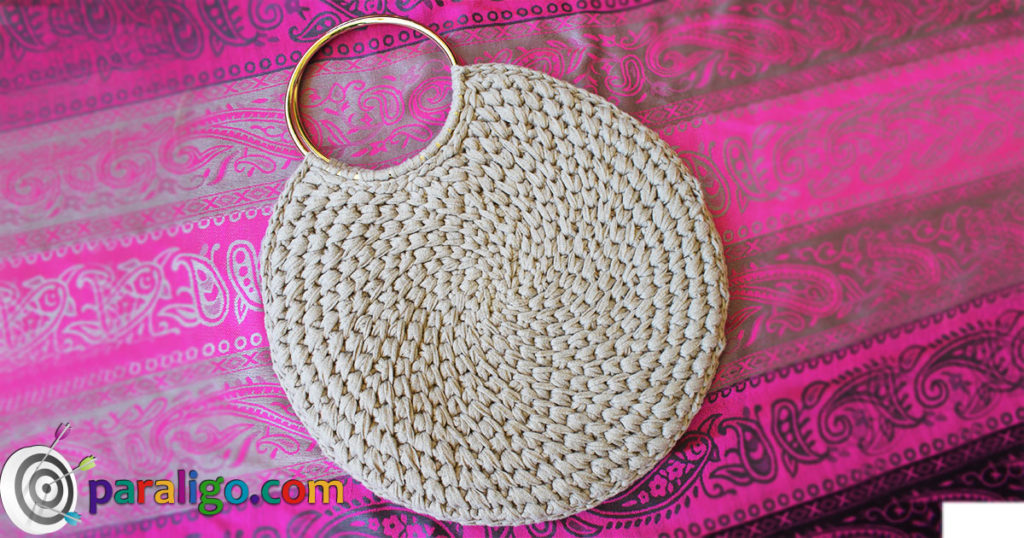
The slanting waistcoat stitch worked in the round in a spiral
Foundation
Work and od number of chain stitches. Then slip stitch to join the ends of your chain into a round. Insert your hook into the last chain, yarn over, and pull through both loops on your hook.
Round One
Place one single crochet into every chain until the end of your chains. To begin insert your hook into the first chain from your hook, yarn over, pull a loop, then yarn over again and pull through both loops on your hook. Repeat until the end of the round.
Round Two
Insert your hook into the first stitch and place a single crochet. Place a stitch marker into this first stitch. Skip the next stitch. Then insert your hook into the following stitch and place one more single crochet. Then go back to the previous stitch, the one you skipped, and place a waistcoat stitch. Insert into the post of the stitch (into the center of the v letter that is formed at the front of a single crochet stitch), yarn over pull a loop yarn over again, and pull through both loops on your hook. This oblique waistcoat stitch is the so-called Slanting waistcoat stitch. Repeat this pattern, one single crochet into the stitch after next, and then one waistcoat stitch into the skipped stitch, until the end of the second round. The last stitch of the round must be a slanting waistcoat stitch.
Round three
Remove the stitch marker, skip the first stitch and place a single crochet into the second. Put the stitch marker back into this first stitch. Skip the next stitch and place a single crochet into the stitch after the next. Go back to the skipped stitch that is a slanting waistcoat stitch and insert your hook into the post of the skipped stitch to place a new slanting waistcoat stitch. Repeat these two stitches until the end of the round. Your last stitch must be the one to be skipped. Skip the last stitch to move to the next round.
Round four
Remove the stitch marker from the first stitch and place a single crochet. Place the stitch marker back to this first stitch. Go back to the last skipped stitch of round 3 and place as slanting waistcoat stitch into the post of the preexisting slanting waistcoat stitch. Go back to the skipped stitch that is a slanting waistcoat stitch and insert your hook into the post of the skipped stitch to place a new slanting waistcoat stitch. Repeat these two stitches until the end of the round. Your last stitch must be the one to be skipped.
Round five and on...
Repeat round four.
Tips
- Being a dense stitch this little fellow might make your life difficult if worked with too much tension. A good trick to make sure this will not happen is to begin your foundation and first round with a hook one size bigger than recommended. You can change your hook to a smaller one from the second round and on.
- This is one of these stitches that look their most when worked with a rich yarn like a T-shirt yarn or a chunky Ribbon yarn. A thick sleek T-shirt yarn of excellent quality will give a nicely textured fabric without breaking your hands
- The slanting waistcoat stitch in truth is not increasable and t it’s hard to be decreased. Therefore it is not the best choice of stitch to create geometrical shapes. However, it can be used to create a round base by alternating rounds of increases in every stitch, with rounds of zero increase, to prevent the wavy effect.
You can watch how you can use the slanting waistcoat stitch to create a flat circle in the following video.
Dos
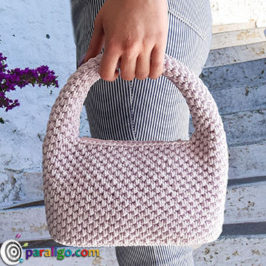
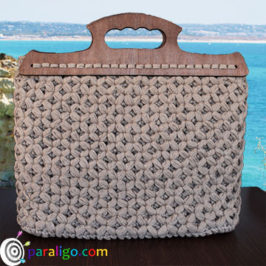
- The slanting waistcoat stitch produces a beautiful woven-like, textured surface that would be an amazing choice for summer bags made with plant fiber yarns like raffia, paper yarn or jute.
- The Slanting waistcoat stitch has an oriental flair and a rich but not voluminous structure that makes it ideal for medium size bags with a boho attitude.
Don’t’s
- If you follow my advice and work this stitch with t-shirt yarn do not use it to create big bags like beach bags or totes. Your bags will end up weighing tones and will very difficult to carry.
- Don’t use this stitch if your yarn supply is not abundant. It’s not a yarn eater but it will consume more yarn than the single crochet or even the regular waistcoat stitch.