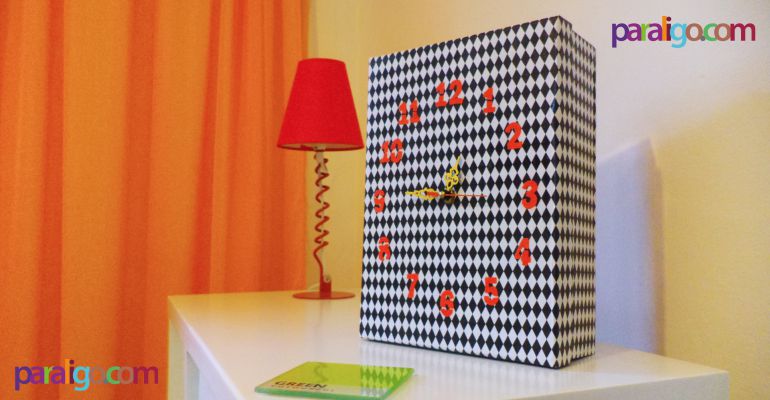
It’s a table clock and a wall clock at the same time. It’s funky, it’s easy, it’ cheap and most of all It’s fun
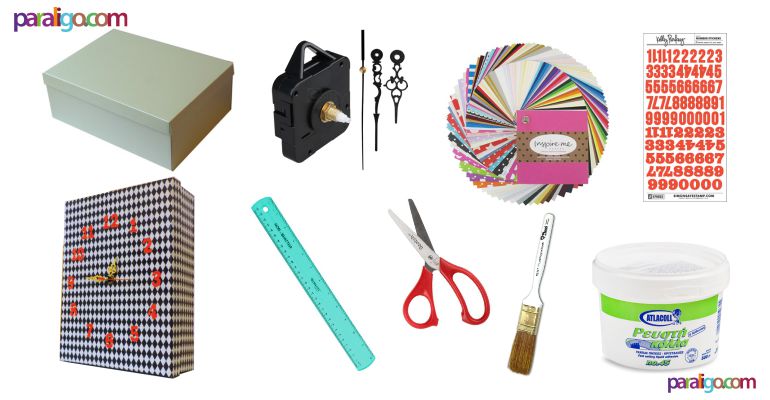
Materials and tools
- Shoebox (the harder the material the better)
- Clock mechanism kit (you can find these in any hobby store)
- Craft paper
- Number stickers
- Modge podge
- Brush
- Scissors
- Ruler
Instructions
Cut 2 pieces of craft paper to match the size of the box and that of the cover. If your paper is not big enough you can use small pieces and glue them together like I did (modge podge is very forgiving).
Apply some modge podge on the box and the cover, place the paper and then apply modge podge again. Do not use too much glue and work from the center to the edges, with small brush strokes trying to eliminate air bubbles. If there still are some air bubbles left in the end don’t worry they will vanish when the paper dries. So let the paper dry.
Find the center of the box cover and open a small hole that fits the movement spindle of the clock kit (the part that holds the “hands”). Fit the clock spindle from the back side of the box cover. Stick the time indicating numbers on the box cover (now that can be tricky so better have some other functional clock nearby to measure the distances). And finally fix the hands of the clock on the spindle. Done!
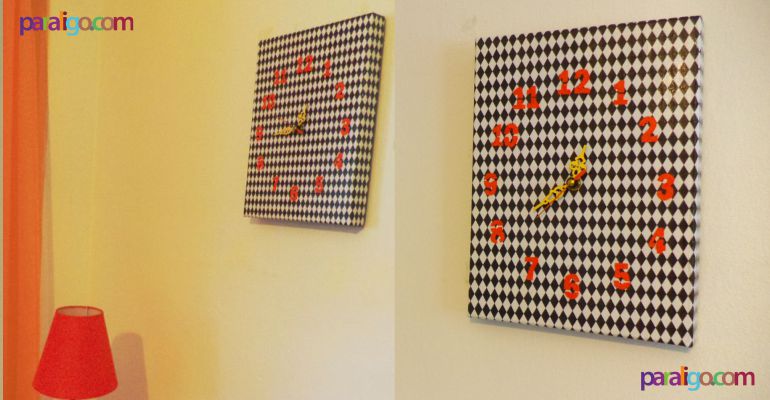
You can use only the box cover as a Wall Clock or place the cover on top of the box and use it as a Table Clock.
Tips
Depending on the craft paper pattern you might have to paint the clock hands in a different color in order to stand out.
If you can’t find a clock mechanism kit you can always use the one from an old Clock you don’t like anymore (they are usually easy to dismantle).