Crochet Purse Square is the subject of my new video tutorial and if the thought of creating your own line of Geometrically Shaped Crochet Bags, puts a smile on your face, stick around cause there are more tutorials to follow.
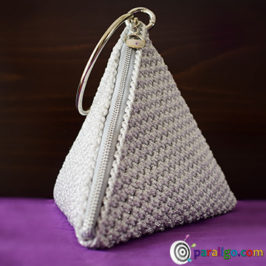
For those of you who lost me, because they obviously missed my previous tutorial, click here to discover how you can make a Crochet Clutch Pyramid. For the rest, there‘s nothing left but to cut to the chase.
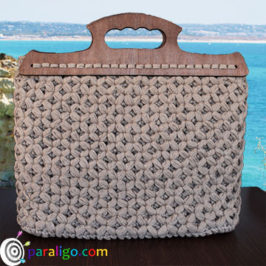
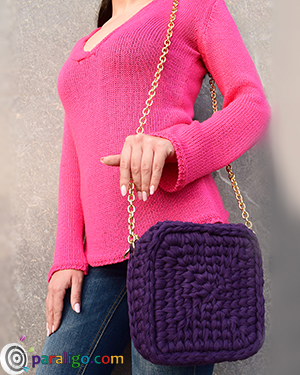
Ladies and Gentleman In continuance of my quest for uncommon, fresh crochet bag designs, I hereby present you the Crochet Purse Square. If you are looking for supplies – wise, budget-friendly, easy to make crochet purse, this pattern is definitely a “square deal.
This crochet bag is of medium difficulty and requires the knowledge of the following crochet stitches and techniques:
- Chain
- Slip stitch
- Magic circle
- Single crochet
- Waistcoat stitch
If despite everything you are an absolute beginner it is my strong belief, that this video is explanatory enough, to guide you step by step to complete this ambitious crochet project.
This crochet bag though square in appearance, is actually worked in the round, using a version of the granny square method. To be precise a version of the solid granny square method.
As you probably already know there are many ways to create a solid granny square. The specific way described below was chosen due to the fact that it helps produce an even uniform fabric, even when using very uneven t-shirt yarn.
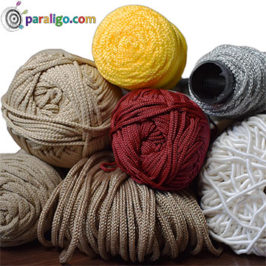
The body of the bag is actually comprised of two big solid granny squares, crocheted with the waistcoat stitch technique. The yarn used for this bag is a chunky T-Shirt Yarn that produces a voluminous and thick fabric with no need for reinforcement.
My advice to you is to choose a yarn that apart from thick is also soft and sleek, otherwise, the waistcoat stitch can be a real malady. The quality of the yarn will also play an important role to the symmetry and evenness of your work which might be the only challenge of this Crochet Purse.
Click here to download the free printable pattern
Supplies:
- 700-800 gr T-Shirt yarn (3cm/1.20inch wide when extended)
- Crochet hook No 7mm (US NO:K/10.75
- Crochet hook No 8mm (US No: L/11) /Crochet hook No 10mm (US No: N/15)
- Crochet hook No 12mm (US No: O/17) Optional
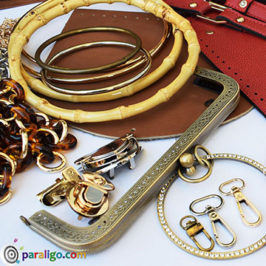
- 2 O Rings with inward opening 2cm /078inch. (internal Dia)
- A metal chain shoulder strap (120cm /47inch)
- 20- 25 cm/ 8-10 inches Zipper
- Sewing needle
- Resilient thread
- Scissors
Solid Granny Square method
Make a magic circle using the hook size 12
Wrap your yarn around your palm to form an x and hold both ends with your thumb.
Turn the back of your palm, insert your hook under the outer strand or yarn, grab the inner strand and twist your hook to bring the loop on top. Pass the outer strand under your pinky, yarn over the inner strand, pull a loop and untwist the yarn.Crochet Purse Square Pattern
Place 7 single crochet into the circle. Insert your hook into the circle yarn over and pull a loop yarn over again and pull through
both loops on your hook.
Repeat 6 more times and keep in mind that we need our initial stitches to be very big and loose
Pull the tail to close your circle. Release your hook. Insert your hook into the first stitch from the inside of the circle and into your open loop.
Draw your open loop in and release your hook. Insert your hook into the post of the last single crochet of the round and through your open loop.
Pull your yarn tight. Yarn over pull a loop and chain one.
Place 2 single crochet into the post of the first stitch of the previous round. insert your hook. yarn over and pull a loop
Yarn over again and pull through both loops on your hook. Place one more into the same spot
Place one waistcoat stitch into the next stitch ( that is single crochet into the post of the stitch) and again 2 waistcoat stitches into the next stitch.
Continue placing 2 waistcoat stitches into the 1st stitch
(I will to them as a Pair) followed by one waistcoat stitch
into the following, until the end of the round.
Release your hook insert into the first stitch from
the reverse side of your work and through your open loop
draw your open loop in, and insert your hook
not into the post not of the last, but of the first stitch of the
previous round and through your open loop.
Pull your yarn tight yarn over pull a loop and chain one to begin the 3d round.
Start the 3d round by placing 1 waistcoat stitch into
the first stitch of the first pair of stitches.
Place 2 single crochet between the pair of
waistcoat stitches.
Place one waistcoat stitch into the
second stitch of the pair.
Here is the pattern for the
rest of the 3d round:
One waistcoat stitch into the next stitch, one waistcoat stitch into the first stitch of the pair 2 single crochet between
the pair and one waistcoat stitch into the second stitch of the pair.
Continue like this until the end of the round. Release
your hook, insert into the first stitch of the round and through your open loop draw the loop and release.
Insert your hook into the post
of the 1st stitch and through the open loop, yarn over, pull a loop and chain one to begin the 4th round
Start the 4th round by placing 1 waistcoat stitch Into the first stitch.
Then place one waistcoat stitch into the 1st stitch of the 1st pair, 2 single crochet between, the stitches of the pair and one waistcoat stitch into the second stitch of the pair.
At the beginning of the round, we are lacking stitches that will be completed At the end of the round.
The actual pattern of the round is the following:
Place 1waistcoat stitch in each of the next 3 stitches. Place 1 waistcoat stitch into the 1st stitch of the pair, then 2 single crochet between the stitches of the pair and finally 1 waistcoat stitch into the 2nd stitch of the pair.
Repeat the same pattern until left with one stitch. Place a waistcoat stitch into the last stitch.
Insert your hook into the 1st stitch from the reverse and through your open loop and draw the loop in. Release your hook and insert into the post of the 1st stitch and through the open loop. Yarn over pull a loop and chain one.
Place 1 waistcoat stitch into each of the first 2 stitches, 1 waistcoat stitch into the 1st stitch of the pair 2 single crochet between the stitches of the pair and 1 waistcoat stitch into the
last stitch of the pair.
Here starts the pattern for the 5th round:
Place 1 waistcoat stitch into each of the next 5 stitches. Place 1 waistcoat stitch into 1st stitch of the pair.
2 single crochet between the stitches of the pair and 1 waistcoat stitch into the second stitch of the pair.
Continue like this until left with 2 stitches. Place 1 waistcoat stitch into each, release your hook, insert into the first stitch from the reverse side of your work and through your open loop and draw the loop in.
Insert the hook into the post of the 1st and through the open loop pull your yarn tight, yarn over pull a loop and chain 1 to begin the 6th round.
Place 3 waistcoat stitches into the next 3 stitches. Place 1 waistcoat stitch into the 1st stitch of the pair. Place 2 single crochet between the stitches of the pair. And place 1 waistcoat stitch into the 2nd stitch of the pair.
Here starts the pattern for the rest of the 6th row:
Place 7 waistcoat stitches into the 7 following stitches.
Place 1 waistcoat stitch into the 1stitch of the pair, 2 single crochet between the 2 stitches of the pair and 1 waistcoat stitch into the 2nd stitch of the pair.
Repeat this pattern until left with 3 remaining stitches. Place 1 waistcoat stitch into each one of them.
Finally, release the hook, insert into the 1stitch from the reverse and through the open loop, and draw the loop in.
Insert your hook into the post of the 1st stitch and through the open loop, yarn over and pull a loop.
Tips
- Ι start my project using a crochet hook size 12. This became necessary as my extremely unsuitable yarn was so stiff, that when pulling the tail to close the magic circle, It was impossible to insert my hook into the posts of the stitches. If your yarn is soft and sleek you can avoid that step and start your work with a crochet hook size 10.
- The yarn I used in the video is strongly not recommended as It is stiff and harsh and creates friction, which turned an otherwise very easy project into a hurdle. Be kind to your hands and get a soft, sleek, yarn of good quality.
- The method I am using to attach the zipper to the bag seemed the only reasonable solution to manage my impenetrable yarn. Provided that you use a friendlier material, you might as well sew the zipper to your bag, the traditional way.